# 快速上手 - 安装步骤
下载地址:https://ext.dcloud.net.cn/plugin?id=2204 (opens new window)
# 后端(云端)安装步骤
uniCloud 目录为云端目录(此目录内的文件不会被打包到前端)
- 右键
uniCloud目录,再点击【云服务空间初始化向导】

如果出现替换确认弹窗,则点替换
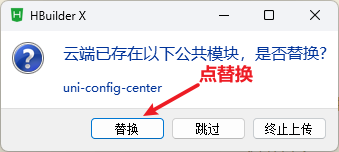
- 等待初始化完成

注意:
- 开发微信小程序和 APP 微信登录需要额外配置 manifest.json 以及 uniCloud/cloudfunctions/common/uni-config-center/uni-id/config.json 这 2 个配置文件,且改动配置后需要重新上传 公共模块 和 router 函数。
- 若你的电脑没有安装 Node.js,则无法使用 npm 命令。
- Node.js 安装包及源码下载地址为:https://nodejs.org/en/download/ (opens new window)
- Node.js 安装教程:https://www.runoob.com/nodejs/nodejs-install-setup.html (opens new window)
查看 uni-id/config.json 代码格式 传送门 (opens new window)
# 前端(页面)安装步骤
# Vue2.0 版本
main.js 引入 vk-unicloud-page 库
// 引入 vk框架前端
import vk from './uni_modules/vk-unicloud';
Vue.use(vk);
2
3
完整 main.js 示例
import Vue from 'vue';
import App from './App';
import store from './store';
import config from '@/app.config.js';

// 引入 vk框架前端
import vk from './uni_modules/vk-unicloud';
Vue.use(vk);

// 初始化 vk框架
Vue.prototype.vk.init({
  Vue, // Vue实例
  config, // 全局配置
});

Vue.config.productionTip = false;

App.mpType = 'app';

const app = new Vue({
  store,
  ...App,
});
app.$mount();
2
3
4
5
6
7
8
9
10
11
12
13
14
15
16
17
18
19
20
21
22
23
24
# Vue3.0 版本
main.js 引入 vk-unicloud-page 库
完整 main.js 示例
import App from './App';
import store from './store';
import config from '@/app.config.js';

// 引入 vk框架前端
import vk from './uni_modules/vk-unicloud';

import { createSSRApp } from 'vue';

export function createApp() {
  const app = createSSRApp(App);

  // 使用 vuex
  app.use(store);

  // 使用 vk框架前端
  app.use(vk);

  // 初始化 vk框架
  app.config.globalProperties.vk.init({
    Vue: app, // Vue实例
    config, // 配置
  });

  return { app };
}
2
3
4
5
6
7
8
9
10
11
12
13
14
15
16
17
18
19
20
21
22
23
24
25
26
# 自 client 端框架 2.6.0 起,不再内置任何 UI 框架,你可以选择自己喜欢的 UI 组件库进行开发。
# 集成 vk-uview-ui(vue2.0 版)
若不想集成 vk-uview-ui 可跳过此处
适合开发:H5、App(vue 版本)、微信小程序、支付宝小程序(其他小程序未验证)
插件市场导入
vk-uview-ui框架:点击前往 (opens new window)
- 1、main.js 引入 vk-uview-ui
import uView from './uni_modules/vk-uview-ui';
Vue.use(uView);
2
- 2、App.vue 引入基础样式(注意 style 标签需声明 scss 属性支持)
<style lang="scss">
  @import './uni_modules/vk-uview-ui/index.scss';
</style>
2
3
- 3、uni.scss 引入全局 scss 变量文件
@import '@/uni_modules/vk-uview-ui/theme.scss';
# 集成 vk-uview-ui(vue3.0 版)
若不想集成 vk-uview-ui 可跳过此处
适合开发:H5、App(vue 版本)、微信小程序(其他小程序未验证)
插件市场导入
vk-uview-ui框架:传送门 (opens new window)
插件市场导入
vue3的scss编译插件:传送门 (opens new window)
不建议把老项目 升级到 Vue3.0 (升级非常麻烦,建议新项目才考虑是否使用 Vue3.0)
注意:目前(2020-11-18) uniapp 的 Vue3.0 版本只兼容:H5、App、微信小程序
- 1、前置步骤:修改
manifest.json内的vue版本为vue3 - 2、项目根目录新增
index.html文件,文件代码为
<!DOCTYPE html>
<html lang="zh-CN">
  <head>
    <meta charset="UTF-8" />
    <meta name="viewport" content="width=device-width, user-scalable=no, initial-scale=1.0, maximum-scale=1.0, minimum-scale=1.0" />
    <title></title>
    <!--preload-links-->
    <!--app-context-->
    <!-- 配置H5的 web图标static/logo.png -->
    <link rel="icon" href="./static/logo.png" />
  </head>
  <body>
    <div id="app">
      <!--app-html-->
    </div>
    <script type="module" src="/main.js"></script>
  </body>
</html>
2
3
4
5
6
7
8
9
10
11
12
13
14
15
16
17
18
- 3、main.js 引入 vk-uview-ui
// 引入 uView UI
import uView from './uni_modules/vk-uview-ui';

import { createSSRApp } from 'vue';

export function createApp() {
  const app = createSSRApp(App);

  // 使用 uView UI
  app.use(uView);

  return { app };
}
2
3
4
5
6
7
8
9
10
11
12
13
- 4、App.vue 引入基础样式(注意 style 标签需声明 scss 属性支持)
<style lang="scss">
  @import './uni_modules/vk-uview-ui/index.scss';
</style>
2
3
- 5、uni.scss 引入全局 scss 变量文件
@import '@/uni_modules/vk-uview-ui/theme.scss';
# 集成 uview-ui(nvue2.0 版)
若不想集成 uview-ui 可跳过此处
适合开发:App(nvue 版本),如果你只开发 App 的 vue2 版本,推荐用这个 UI
安装步骤
插件市场导入
uview-ui框架:点击前往 (opens new window)
- 1、main.js 引入 uview-ui
import uView from './uni_modules/uview-ui';
Vue.use(uView);
2
- 2、App.vue 引入基础样式(注意 style 标签需声明 scss 属性支持)
<style lang="scss">
  @import './uni_modules/uview-ui/index.scss';
</style>
2
3
- 3、uni.scss 引入全局 scss 变量文件
@import '@/uni_modules/uview-ui/theme.scss';
# 集成 uview-ui(nvue3.0 版)
别想了,还没出生。
# 集成 tmui(vue2.0 版)
若不想集成 tmui 可跳过此处
适合开发:App(非 nvue 版本)、H5、微信小程序、支付宝小程序、头条小程序等
安装步骤
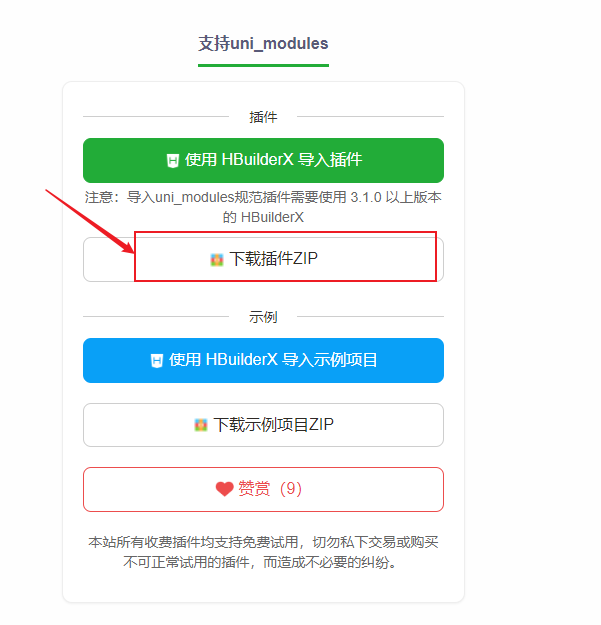
- 1、前往插件市场下载,记得直接点【下载插件 ZIP】 传送门 (opens new window)
2、解压刚下载的 ZIP 文件,可以看到里面还有 1 个
tm-vuetify.zip,你没看错,继续解压里面这个tm-vuetify.zip(点解压到tm-vuetify\) 得到tm-vuetify目录(这个目录才是插件真正代码)3、将上一步解压得到的
tm-vuetify目录复制到你的 VK 框架项目(client 端)根目录(与 App.vue 同级目录)4、配置
main.js
// 引入tmui组件库
import tmVuetify from './tm-vuetify';
Vue.use(tmVuetify);
2
3
完整 main.js 代码
import Vue from 'vue';
import App from './App';
import store from './store';
import config from '@/app.config.js';

// 引入tmui组件库
import tmVuetify from './tm-vuetify';
Vue.use(tmVuetify);

// 引入 vk框架前端
import vk from './uni_modules/vk-unicloud';
Vue.use(vk);

// 初始化 vk框架
Vue.prototype.vk.init({
  Vue, // Vue实例
  config, // 配置
});

Vue.config.productionTip = false;

App.mpType = 'app';

const app = new Vue({
  store,
  ...App,
});

app.$mount();
2
3
4
5
6
7
8
9
10
11
12
13
14
15
16
17
18
19
20
21
22
23
24
25
26
27
28
29
- 5、
App.vue配置样式
<style lang="scss">
  /*每个页面公共css */
  @import './tm-vuetify/mian.min.css';
  @import './tm-vuetify/scss/theme.css';
  @import './common/css/app.scss';
</style>
2
3
4
5
6
- 6、配置
pages.json内的easycom规则
{
  "easycom":{
    "autoscan": true,
    "custom":{
      "^tm-(.*)": "@/tm-vuetify/components/tm-$1/tm-$1.vue"
    }
  },
  "pages": [
    ...
}
2
3
4
5
6
7
8
9
10
- 7、完成,启动项目。
注意:如果启动项目报错 Uncaught Error: [vuex] getters should be function but "getters.$user/getUserInfo" in module "index"
则删除项目根目录下的 store/modules/$user.js 内 getters 内的所有方法,如删除 getUserInfo 方法
或者
修改 tm-vuetify/tool/store/tm-vuetify.js 文件内
const modulesList = require.context('@/store', true, /\.js$/);
改成
const modulesList = require.context('@/store/modules', true, /\.js$/);
# 集成 tmui(nvue3.0 版)
若不想集成 tmui 可跳过此处
适合开发:App(nvue 版本),目前为数不多的 nvue3.0 组件库。H5、微信小程序、支付宝小程序等
插件市场导入
vue3的scss编译插件:传送门 (opens new window)
安装步骤
1、前往插件市场下载,记得直接点【下载插件 ZIP】 传送门 (opens new window)
2、解压刚下载的 ZIP 文件,可以看到里面还有 1 个
tmui.zip,你没看错,继续解压里面这个tmui.zip(点解压到当前文件夹) 得到tmui目录(这个目录才是插件真正代码)3、将上一步解压得到的
tmui目录复制到你的 VK 框架项目(client 端)根目录(与 App.vue 同级目录)4、在根目录新建
theme目录,并在theme目录新建index.ts文件,注意是ts文件,文件内容为
export const theme = {
  // 这里输入你定义的主题主色
  //比如:"primary": "#FF0000"
  //名称如果与自带主题相同,将会覆盖。
};
2
3
4
5
- 5、在根目录新建
router目录,并在router目录新建index.ts文件,注意是ts文件,文件内容为
import { ComponentPublicInstance, nextTick } from 'vue';
//如果想要使用框架的自带工具函数请输入uni.$tm.u.?你的方法
//网络请示为uni.$tm.fetch.?你的方法
interface beforeRouterOpts {
  path: string | null; //当前页面路径,不含前缀 /
  opts?: any; //页面参数
  openType?: string; //当前页面打开的类型
  context: ComponentPublicInstance | null;
}

/**
 * 路由访问前执行的函数
 * @param path 页面路径,不带前缀/
 */
export const useTmRouterBefore = (arg: beforeRouterOpts): void => {
  // 每一个页面在初化前都会执行
  //返回事件,只有在h5端可以被拦截。
  if (arg.path) {
  }
};
/**
 * 路由访问后执行的函数
 * @param path 页面路径,不带前缀/
 * @param opts 页面加载完成后返回的参数
 */
export const useTmRouterAfter = (arg: beforeRouterOpts): void => {
  //每一个页面初始后都会执行
};
2
3
4
5
6
7
8
9
10
11
12
13
14
15
16
17
18
19
20
21
22
23
24
25
26
27
28
- 6、在项目根目录执行 npm 命令
npm i pinia
该组件库依赖这个库
- 7、配置
main.js
// 引入tmui组件库
import * as Pinia from 'pinia';
import tmui from './tmui/index.ts';

import { createSSRApp } from 'vue';

export function createApp() {
  const app = createSSRApp(App);

  // 在 vue3的 createApp 内引入 tmui 组件库
  app.use(Pinia.createPinia());
  app.use(tmui);

  return { app };
}
2
3
4
5
6
7
8
9
10
11
12
13
14
15
完整 main.js 代码
import App from './App';
import store from './store';
import config from '@/app.config.js';

// 引入tmui组件库
import * as Pinia from 'pinia';
import tmui from './tmui/index.ts';

// 引入 vk框架前端
import vk from './uni_modules/vk-unicloud';

import { createSSRApp } from 'vue';

export function createApp() {
  const app = createSSRApp(App);

  // 引入vuex
  app.use(store);

  // 引入 tmui 组件库
  app.use(Pinia.createPinia());
  app.use(tmui);

  // 引入 vk框架前端
  app.use(vk);

  // 初始化 vk框架
  app.config.globalProperties.vk.init({
    Vue: app, // Vue实例
    config, // 配置
  });

  return { app };
}
2
3
4
5
6
7
8
9
10
11
12
13
14
15
16
17
18
19
20
21
22
23
24
25
26
27
28
29
30
31
32
33
34
- 7、
App.vue配置样式
<style lang="scss">
  /* #ifdef APP-NVUE */
  @import './tmui/scss/nvue.css';
  /* #endif */
  /* #ifndef APP-NVUE */
  @import './tmui/scss/noNvue.css';
  /* #endif */
  @import './common/css/app.scss';
</style>
2
3
4
5
6
7
8
9
- 8、配置
pages.json内的easycom规则
{
  "easycom":{
    "autoscan": true,
    "custom":{
      "^tm-(.*)": "@/tmui/components/tm-$1/tm-$1.vue"
    }
  },
  "pages": [
    ...
}
2
3
4
5
6
7
8
9
10
- 9、完成,启动项目。
# 组件库并不限制只能从以上选择,理论上支持任何 uniapp 的 UI 组件库进行开发。
# 卸载 uView1 的步骤
- 1、main.js 删除 uView1
import uView from 'uview-ui';
Vue.use(uView);
2
- 2、App.vue 删除基础样式
<style lang="scss">
  @import 'uview-ui/index.scss';
</style>
2
3
- 3、uni.scss 删除全局 scss 变量文件
@import 'uview-ui/theme.scss';
- 4、pages.json 删除 easycom 规则
"easycom": {
  "^u-(.*)": "uview-ui/components/u-$1/u-$1.vue",
},
2
3
- 5、package.json 删除 uview-ui 依赖
"dependencies": {
  "uview-ui": "^1.8.3"
},
2
3
- 6、package-lock.json 删除 uview-ui 依赖
"dependencies": {
  "uview-ui": {
    "version": "1.8.3",
    "resolved": "https://registry.npmjs.org/uview-ui/-/uview-ui-1.8.3.tgz",
    "integrity": "sha512-DqKc+qRrOZLPcyfWv4b0HspSS9n1Cd6BbgKiYEv9rjTAnWoqJV7rXsvWqZdr5iKGP5EMNbNS741GLNw4sIHbpw=="
  }
}
2
3
4
5
6
7
# 卸载 vk-uview-ui 的步骤
- 1、main.js 删除 vk-uview-ui
import uView from './uni_modules/vk-uview-ui';
Vue.use(uView);
2
- 2、App.vue 删除基础样式
<style lang="scss">
  @import './uni_modules/vk-uview-ui/index.scss';
</style>
2
3
- 3、uni.scss 删除全局 scss 变量文件
@import '@/uni_modules/vk-uview-ui/theme.scss';
- 4、删除 uni_modules/vk-uview-ui 整个目录